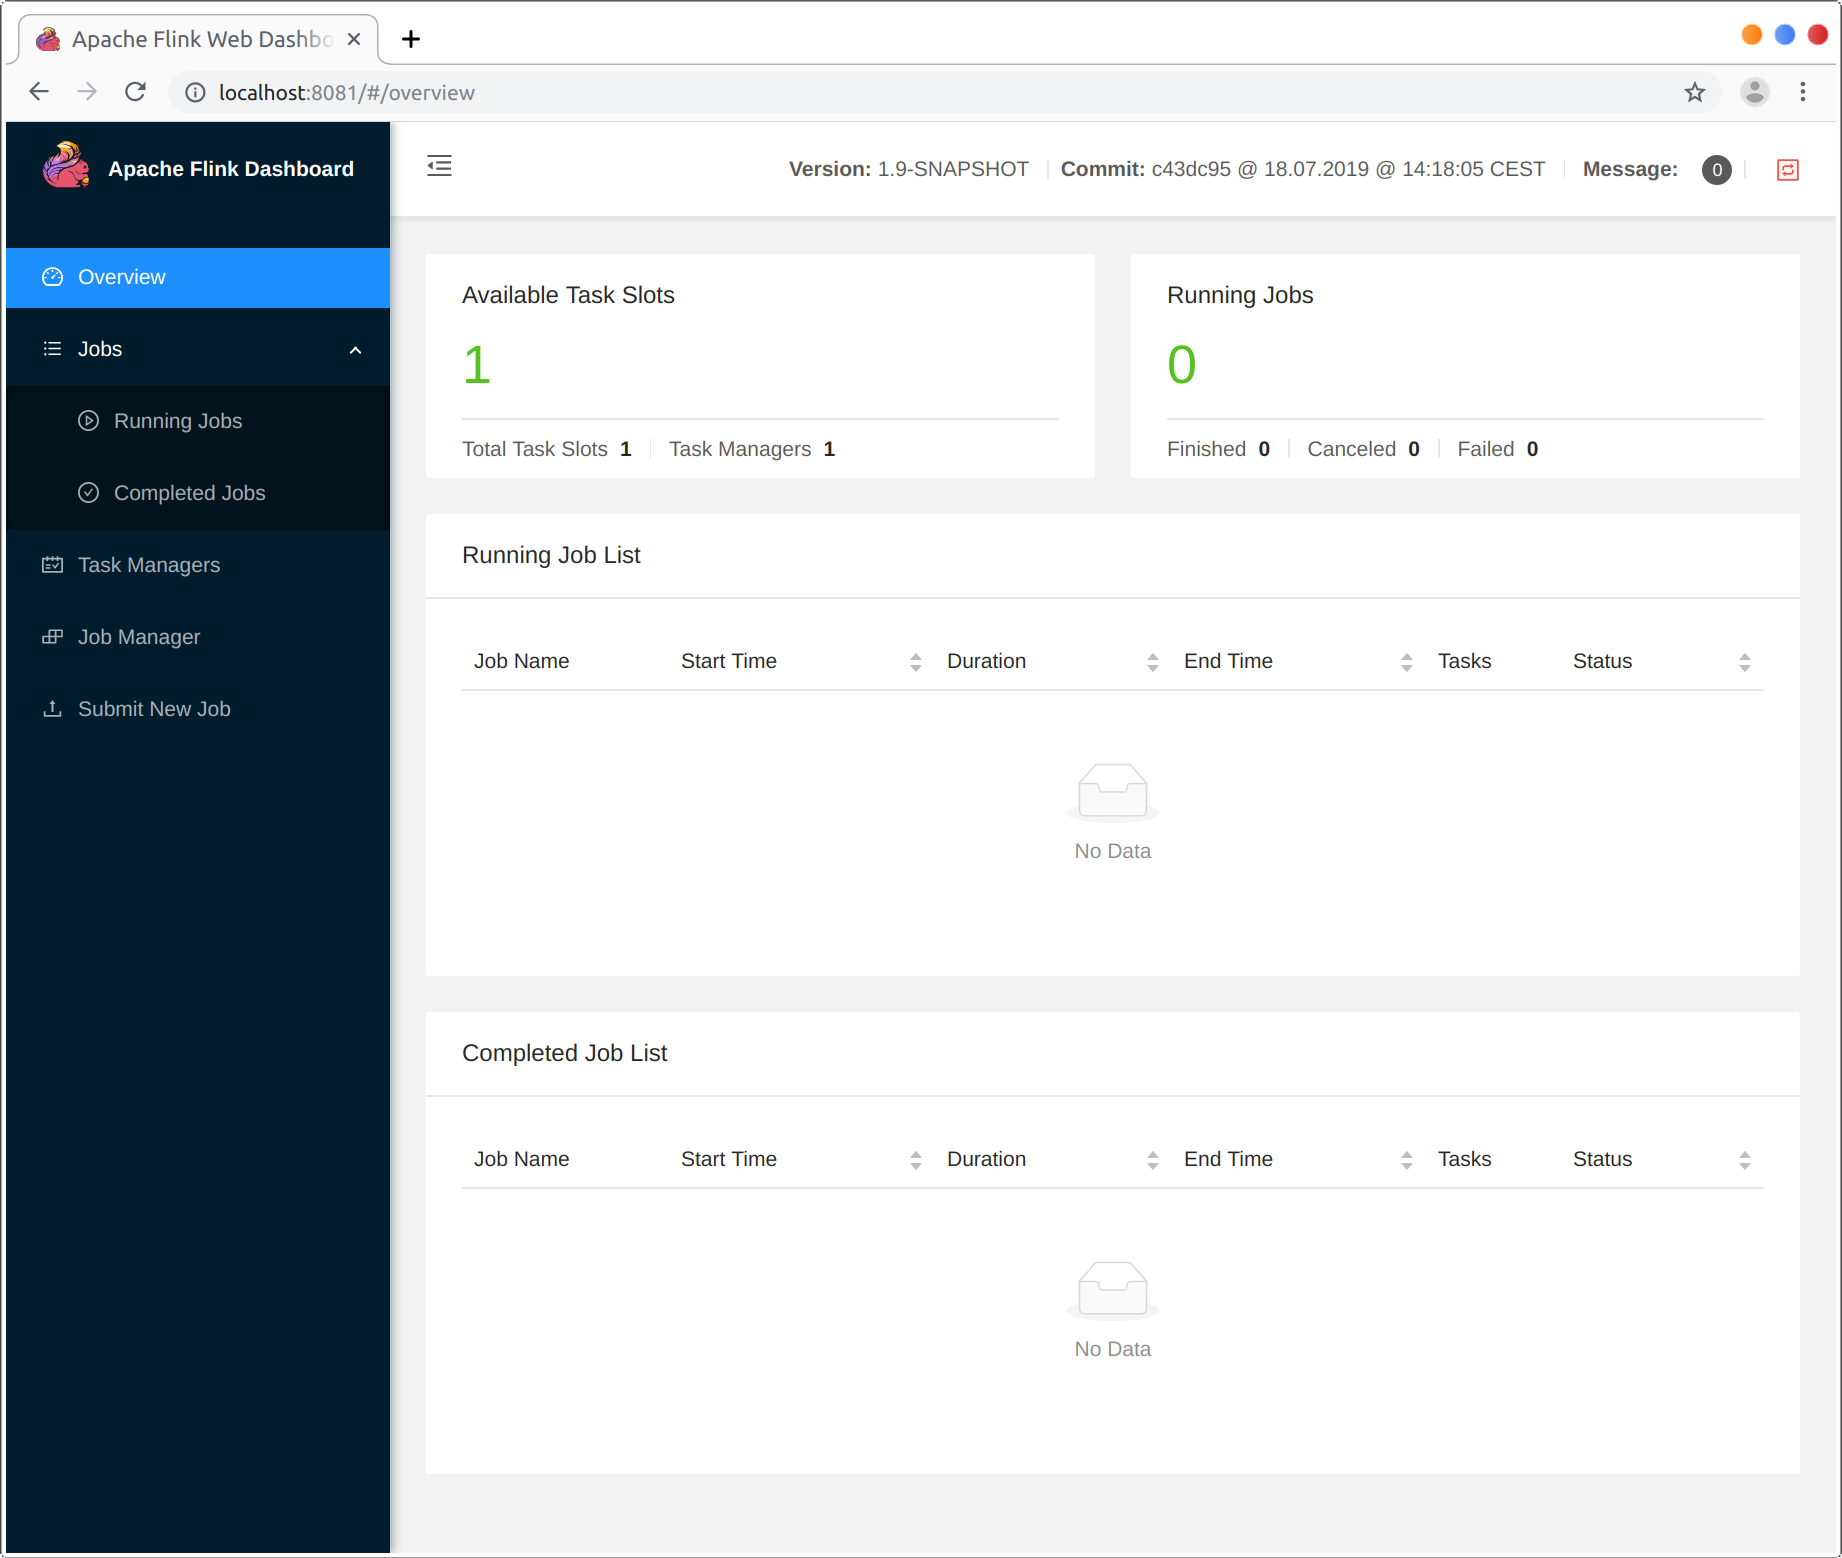
Apache Flink快速入门

本篇的目的是带Apache Flink初学者引入Flink的大门,并提供一个Word Count的示例来了解如何使用Flink框架,希望能给各位开发爱好者提供浅显易懂的理解。

1. Java运行环境

Apache Flink是基于Java语言开发的,并且能运行在Windows, Linux和Mac OS操作系统上。为了能正常运行Flink, 唯一的前提条件是确保安装了Java 6或更高版本的版本,并且已设置JAVA_HOME环境变量。

2. Flink在Windows环境下运行

如果要在Windows计算机上本地运行Flink,则需要下载Flink二进制发行版并解压缩。之后,您可以使用Windows批处理文件(.bat),也可以使用Cygwin运行Flink Jobmanager。 (Flink下载地址)

2.1. 以.bat文件启动

要从Windows命令行启动Flink,请打开命令窗口,导航到Flink的bin/目录,然后运行start-cluster.bat。
注意:Java运行时环境的bin文件夹必须包含在Window的%PATH%变量中。

1
2
3
4
5
6
$ cd flink
$ cd bin
$ start-cluster.bat
Starting a local cluster with one JobManager process and one TaskManager process.
You can terminate the processes via CTRL-C in the spawned shell windows.
Web interface by default on http://localhost:8081/.

然后,您需要打开另一个终端使用flink.bat运行作业。

2.2. 安装Cygwin以Unix脚本启动

使用Cygwin,您需要启动Cygwin终端,导航到Flink目录并运行start-cluster.sh脚本:

1
2
3
$ cd flink
$ bin/start-cluster.sh
Starting cluster.

3. Flink在非Windows环境下运行

  • 在此处下载最新的flink二进制文件, 可以选择任意的scala版本:例如Apache Flink 1.9.1 for Scala 2.12。如果您打算使用Hadoop,请选择hadoop相关构件版本。
  • 解压文件压缩包并启动Flink:
    1
    2
    tar xzvf flink-1.9.1-bin-scala_2.12.tar.gz   #Unpack the downloaded archive
    ./flink/bin/start-cluster.sh #Start Flink
    Flink已配置为在本地运行。要确保flink正在运行,您可以检查flink/log/中的日志,或打开在http://localhost:8081上运行的flink jobManager的界面。
  • 停止Flink:
    1
    ./flink/bin/stop-cluster.sh

4. Flink开发环境

要从您的IDE运行flink程序(我们可以使用Eclipse或Intellij IDEA(推荐)),您需要两个依赖项:flink-java/flink-scala和flink-clients(自2016年2月起)。可以使用Maven和SBT添加这些JARS(如果使用的是Scala)。这里我们只介绍如何使用Java进行获取依赖项,而且后面的代码也同样基于Java程序作为示例。
核心的Maven依赖包括如下:

1
2
3
4
5
6
7
8
9
10
11
12
13
14
15
16
17
18
19
20
21
22
23
24
25
26
27
28
<properties>
<project.build.sourceEncoding>UTF-8</project.build.sourceEncoding>
<project.reporting.outputEncoding>UTF-8</project.reporting.outputEncoding>
<java.version>1.8</java.version>
<flink.version>1.9.1</flink.version>
...
</properties>

<dependency>
<groupId>org.apache.flink</groupId>
<artifactId>flink-java</artifactId>
<version>${flink.version}</version>
</dependency>
<dependency>
<groupId>org.apache.flink</groupId>
<artifactId>flink-streaming-java_2.11</artifactId>
<version>${flink.version}</version>
</dependency>
<dependency>
<groupId>org.apache.flink</groupId>
<artifactId>flink-clients_2.11</artifactId>
<version>${flink.version}</version>
</dependency>
<dependency>
<groupId>org.apache.flink</groupId>
<artifactId>flink-connector-wikiedits_2.11</artifactId>
<version>${flink.version}</version>
</dependency>

5. Socket Window Word Count示例代码

您可以在GitHub上找到此SocketWindowWordCount示例的完整Java版源代码

1
2
3
4
5
6
7
8
9
10
11
12
13
14
15
16
17
18
19
20
21
22
23
24
25
26
27
28
29
30
31
32
33
34
35
36
37
38
39
40
41
42
43
44
45
46
47
48
49
50
51
52
53
54
55
56
57
58
59
60
61
62
63
64
65
66
67
68
69
70
71
72
73
import org.apache.flink.api.common.functions.FlatMapFunction;
import org.apache.flink.api.common.functions.ReduceFunction;
import org.apache.flink.api.java.utils.ParameterTool;
import org.apache.flink.streaming.api.datastream.DataStream;
import org.apache.flink.streaming.api.environment.StreamExecutionEnvironment;
import org.apache.flink.streaming.api.windowing.time.Time;
import org.apache.flink.util.Collector;

public class SocketWindowWordCount {

public static void main(String[] args) throws Exception {

// the port to connect to
final int port;
try {
final ParameterTool params = ParameterTool.fromArgs(args);
port = params.getInt("port");
} catch (Exception e) {
System.err.println("No port specified. Please run 'SocketWindowWordCount --port <port>'");
return;
}

// get the execution environment
final StreamExecutionEnvironment env = StreamExecutionEnvironment.getExecutionEnvironment();

// get input data by connecting to the socket
DataStream<String> text = env.socketTextStream("localhost", port, "\n");

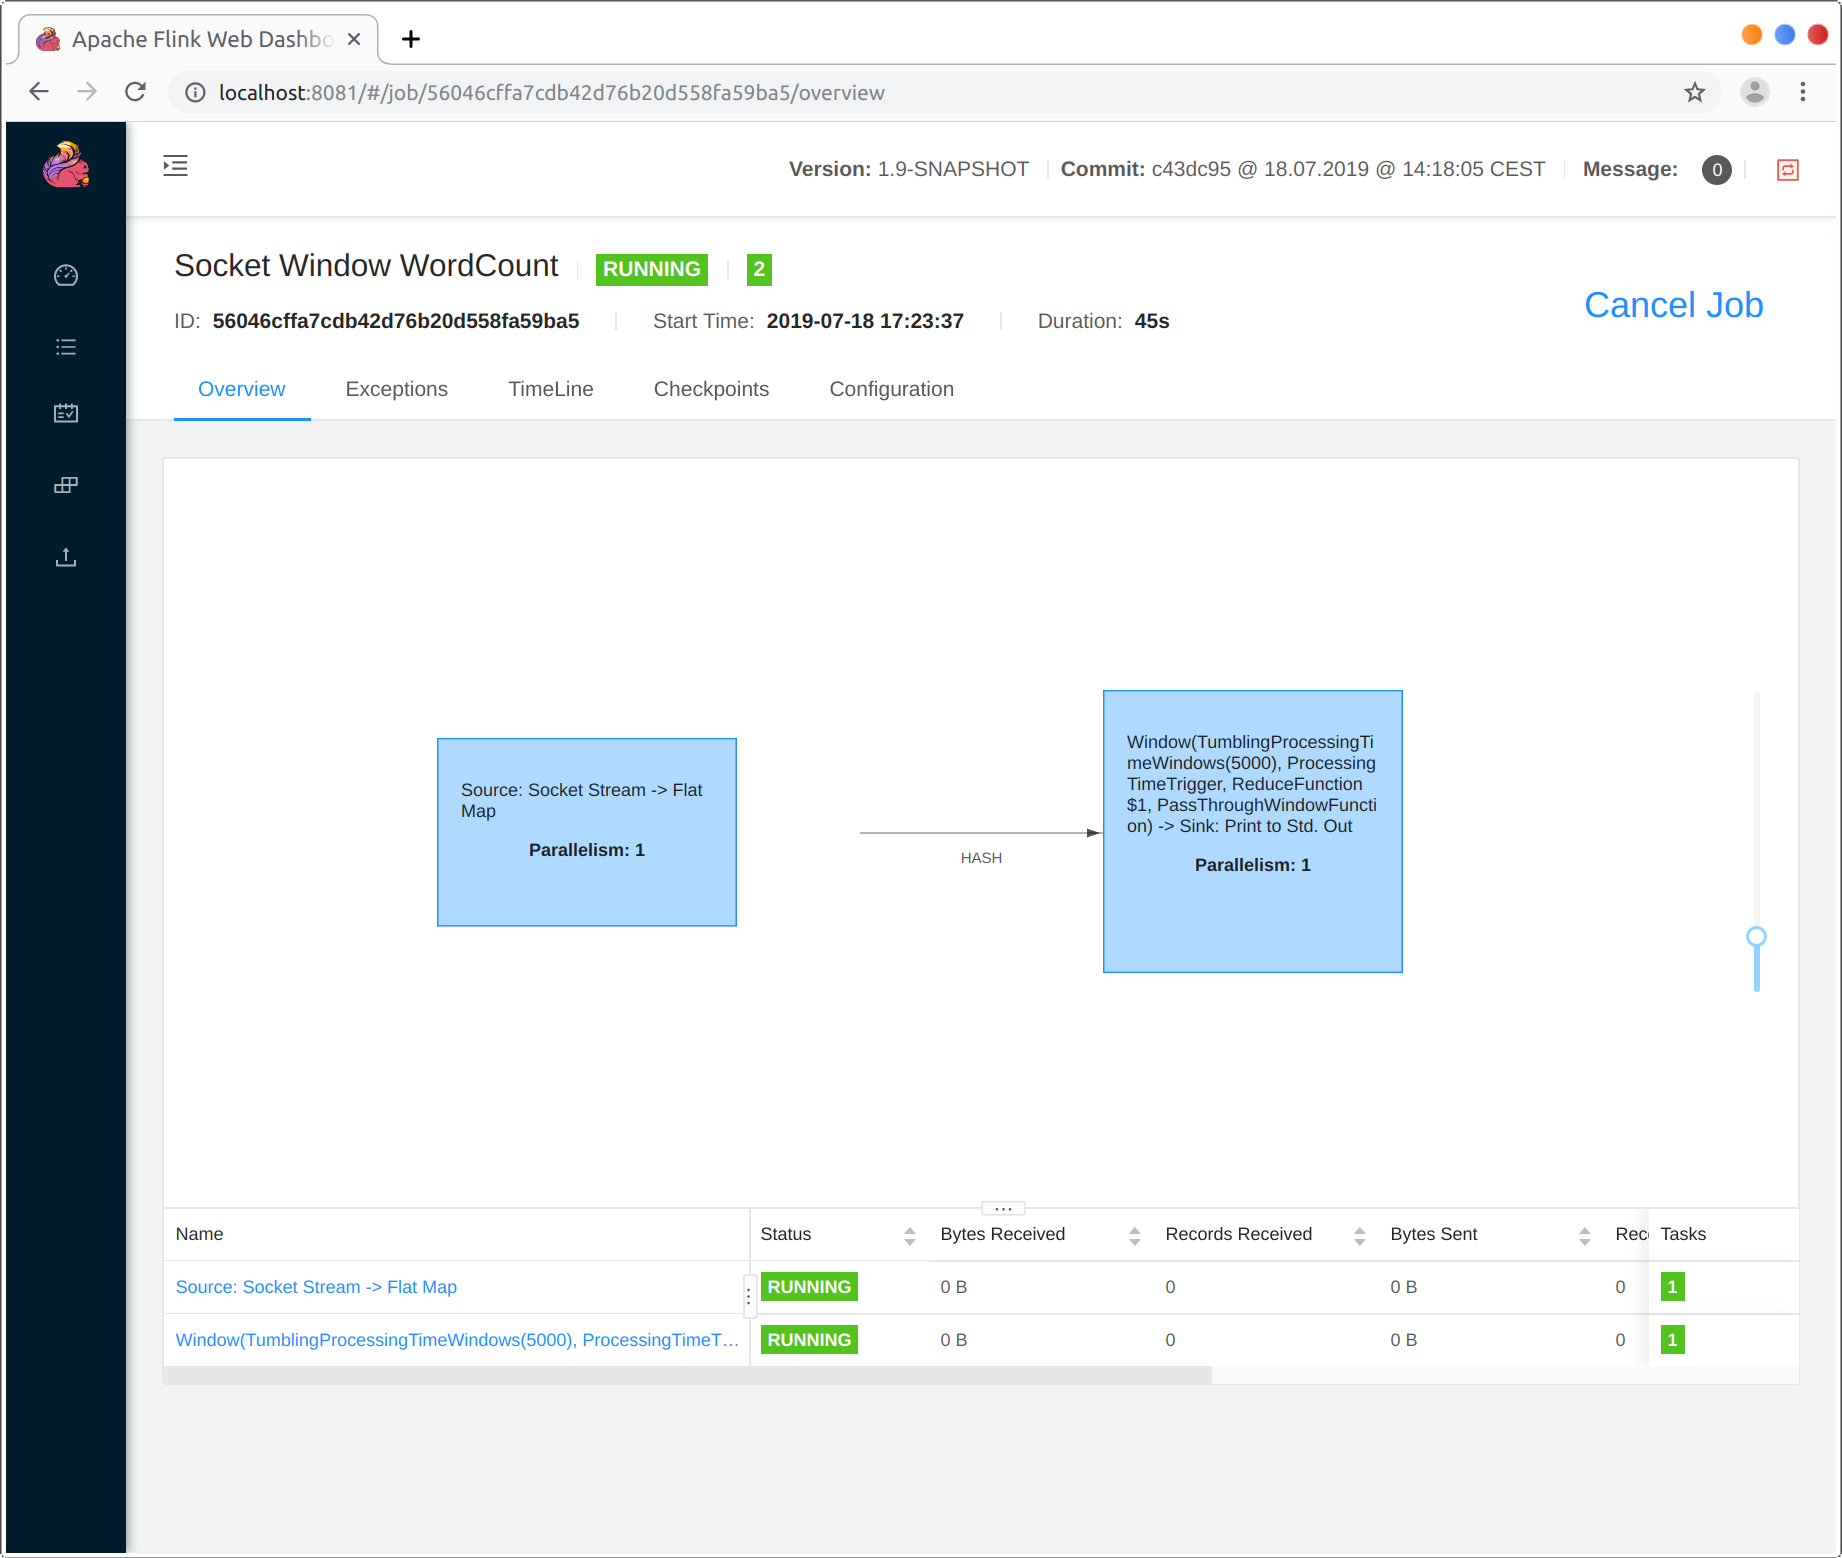
// parse the data, group it, window it, and aggregate the counts
DataStream<WordWithCount> windowCounts = text
.flatMap(new FlatMapFunction<String, WordWithCount>() {
@Override
public void flatMap(String value, Collector<WordWithCount> out) {
for (String word : value.split("\\s")) {
out.collect(new WordWithCount(word, 1L));
}
}
})
.keyBy("word")
.timeWindow(Time.seconds(5), Time.seconds(1))
.reduce(new ReduceFunction<WordWithCount>() {
@Override
public WordWithCount reduce(WordWithCount a, WordWithCount b) {
return new WordWithCount(a.word, a.count + b.count);
}
});

// print the results with a single thread, rather than in parallel
windowCounts.print().setParallelism(1);

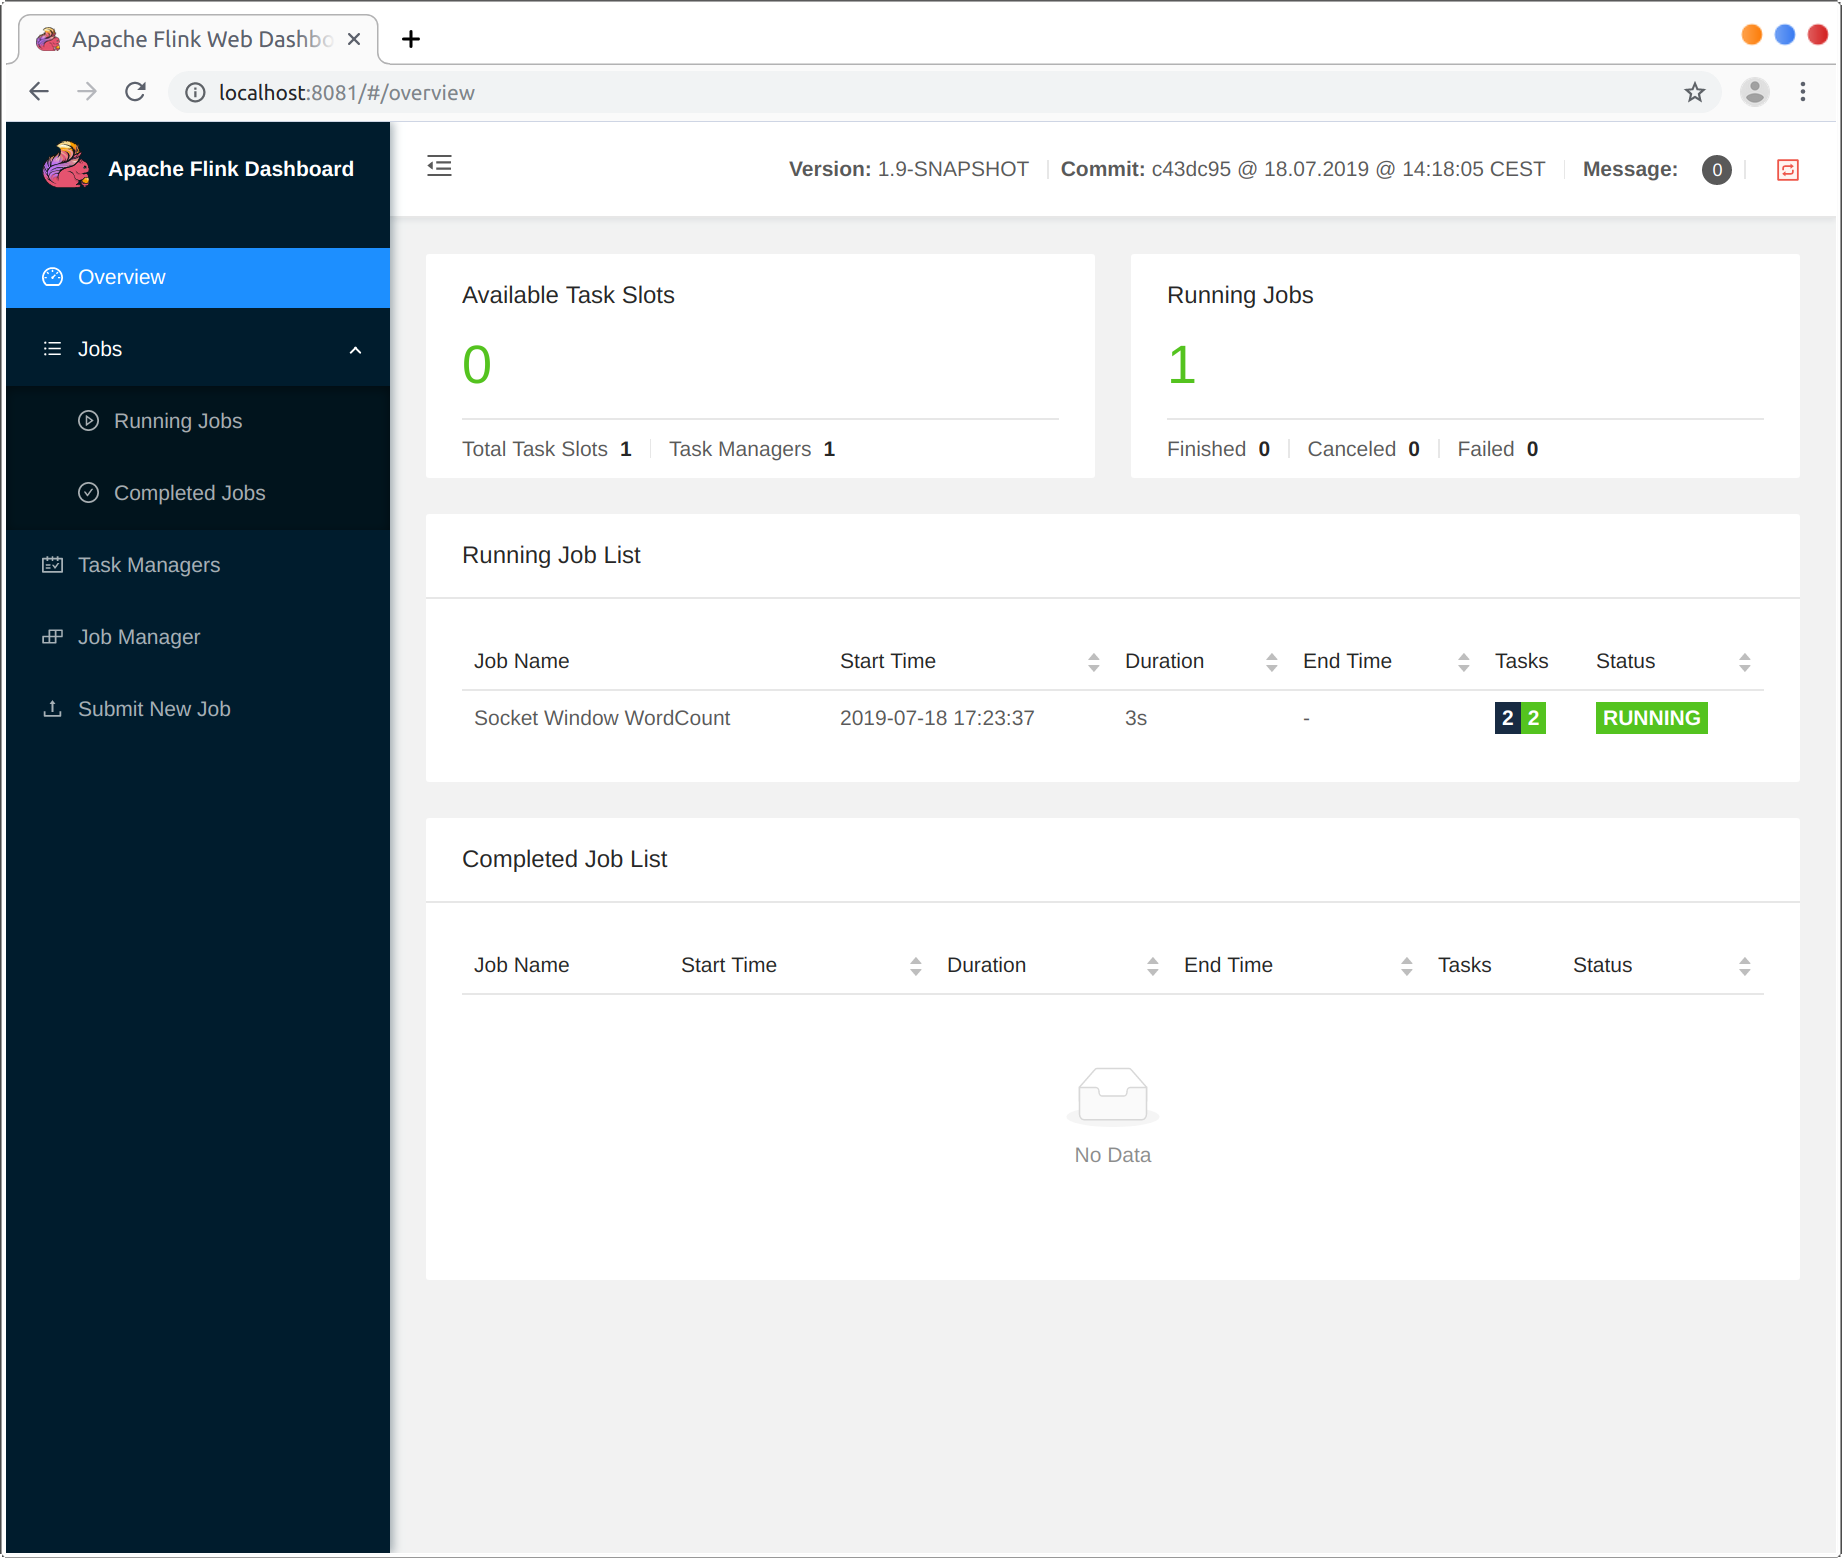
env.execute("Socket Window WordCount");
}

// Data type for words with count
public static class WordWithCount {

public String word;
public long count;

public WordWithCount() {}

public WordWithCount(String word, long count) {
this.word = word;
this.count = count;
}

@Override
public String toString() {
return word + " : " + count;
}
}

}

更多参考:Flink官方示例代码

5. 运行Socket Window Word Count示例

接下来,我们来运行演示名为SocketWindowWordCount的Flink应用示例。

  • 首先,我们使用netcat在CMD命令窗口中通过以下方式启动本地服务:
    1
    $ nc -l -p 9000
  • 然后,通过flink run命令提交Flink程序:
    1
    2
    $ ./bin/flink run SocketWindowWordCount.jar --port 9000
    Starting execution of program
    程序连接到socket套接字并等待输入。您可以检查Web界面以验证作业是否按预期运行:
  • 接着我在CMD命令窗口输入下面数个单词:
    1
    2
    3
    4
    $ nc -l -p 9000
    lorem ipsum
    ipsum ipsum ipsum
    bye
  • 我们会在启动的Flink集群的任一个窗口看到如下输出:
    1
    2
    3
    lorem : 1
    bye : 1
    ipsum : 4
    这里如果遇到应用程序报Flink Connection refused错误,请参考如下链接:

References:

  1. Apache Flink Documentation;
  2. Getting Started with Apache-Flink.